Friday, March 12, 2010

Weekly Sketch

Oh how I love Friday!! In fact, it is the most looked forward to day of the week! LOL

Today I'm going to share another fun sketch from Inspired Blueprints (sketch #40.)

The Sketch:

I substituted the two round photos with a circle element and just one photo, and I also cut the scallop border into 3 pieces (can you spot them in my layout?).

My Example:

I love to play with sketches, as there can be so many ways to interpret them. Have fun with this IB sketch and remember to share your creativity with us here, as well as at IB site http://www.inspiredblueprints.blogspot.com/. The sketch site had just moved, leave a comment on the new Inspired Blueprints blog by 31 March 2010 to win a pack of yummy goodies!

Have fun and enjoy the weekend!

Thursday, March 11, 2010

Stash Faves

I am so in love with MME's Life Stories! The printing on the kraft papers is so beautiful, making them even more fun to play with.

Here is a gorgeous mini album by Anam Stubbington, using Life Stories, of course!
http://mymindseye.typepad.com/blog/2010/01/an-everyday-love.html

I was so excited when I opened my box from the Stash and found the Life Stories line inside! I sat down and started scrapping, happily creating a layout a day using those beautiful kraft papers. Below are the 3 layouts that I did in those 3 days:

(1) after school

(2) s.a.m.

(3) Simply Fun

The last layout was inspired by the design of a layout ("photo shoot") by our March Featured Member - Scrappycat. You can check out her beautiful works here:
http://www.yourscrapbookstash.com/gallery/thumbnails.php?album=lastupby&uid=660

Hope you have fun creating with these gorgeous kraft papers like me! We can't wait to see what you create in your gallery.

Wednesday, March 10, 2010

February Featured Member- Paperfections

Last month our featured member from the User Gallery was Pearl user name Paperfections. She is a very talented scrapper with a unique style. Make sure to check out all the inspiration in her gallery! Here are a few of my favorite layouts from her.

Along with being the featured member for the month of February and winning some Stash Cash the design team each chose a page hers to scraplift. It was a fun challenge and cool to see how everyone's takes on her pages came out so different. Here are our pages and to see more visit the DT Gallery.

Lady Grace's:

April's:

Wendy's:

Alyssa's:

Liz's:

Carrie's:
Thanks for the great Inspiration Pearl!

February Gallery Recap

I keep thinking that each month, the 6 fabulous girls on my Design Team couldn't wow me more than the month before....but they do!


Laura Craigie - our Guest Designer. She worked with Jenni Bowlin's baby papers and a mixture of Elle's Studio product. Check out her cards using the new releases. This new line from Elle can be used year-round not just for Valentines Day!

Alyssa - Alyssa used a mixture of Sassafras and American Crafts in her gallery. Check out that paper cutting!

Carrie - Carrie rocked the Pink Paislee and October Afternoon papers she worked with. She's also the Sketch 'Queen'. She works a sketch like nobody's business.

Wendy - Check out what Wendy can do with vintage papers and mists!

Lady Grace - Think Fall papers are just for Fall? Check out what Lady Grace did with the Amber Road line from Pink Paislee!

April - More Sassafras, Crate Paper and some Maya Road mixed in. And did you see the little journal? I love using scraps to cover the front of my idea books.

Liz - I love what she did with the Crate Paper and My Little Shoebox papers.

*Don't forget to check out the Sketch Challenge Blog that Liz has for more sketches and inspiration. We are the sponsor for March and there are 2 Stash Cash certificates up for grabs!


As always, click on their names to be taken to their Gallery for the month. There is always more inspiration and you can view the list of supplies for projects. Make sure you leave them some love for sharing their talents with you!

Tuesday, March 9, 2010

Tuesday Tips and Techniques

Cup-cake Tag

Here are 3 reasons why I love to create tags:
  • 1) small
  • 2) quick
  • 3) fun
It is Tuesday, and I am going to share a really fun and quick tag here with you.

  • 1) cut out two pieces of pp from scraps.
  • 2) trim and ink the edges.
  • 3) adhere the two pieces together.
  • 4) punch a hole on top and tie it with ribbons. Embellish the top and bottom parts of the cupcake.

You can tie it to a party favor, atop a present, or even use it on a layout!

Have fun creating!

Challenge winners, Guest Designers and Featured Members......

First, the Guest Designer for March.
Jaz Lee. You might remember her from the Guest Designer from last years GDT. We loved her work so much we brought her back!

You can see more of her work in her Gallery from last year, her current gallery and of course, her fabulous blog!

We'll have another update on Jaz later in the month.

Featured Member - Scrappycat (Catherine Ng)
The Design Team picked Catherine as the Featured Member for March and deservedly so. Her gallery is inspiring! Check back later in the month to see what the Design Team did to scraplift her!

February Challenge Winners.....

I know, we're late on this one but its been a busy week.

Here are your challenge winners:

Elle's Studio Challenge - Piradee
Sketch Challenge - Scrappycat
5-4-3-2-1 Challenge - Jade
Congratulations! Please send an email to admin (at) yourscrapbookstash.com with your name and mailing address so we can get your prize packs out in the mail to you!


Saturday, March 6, 2010

My Minds Eye Quite Contrary

Another line for you to fall in love with - or 4 lines!

My Minds Eye Quite Contrary contains 4 lines (Little Boy Blue, Little Miss Muffet, Jack & Jill, Mary Mary).

Each line contains 3 diecut papers, 7 double-sided papers and 20 different embellishments including cardstock stickers, journaling cards and diecuts.
All available in the store now!

Friday, March 5, 2010

Friday Sketch

It's sketch time once again here at YSS! For today's sketch, we will be having fun with titles. Do not hesitate to combine different alpha sizes, fonts and colors.

I made this sketch exclusively for YSS! Have fun!!!

My layout:I have mentioned yesterday how much I love Making Memories Love Struck line so once again, i have used it on my layout. I just love all those hearts that came with their patterned papers. So cute!
Cardstock: Bazzill Kraft
Patterned Papers: Making Memories Love Struck Mine Stripe, Valentine Tag,Pattern heart
Brads: Making Memories
Others: Maya Road Pewter key

Get chosen as the Guest Designer for the month! Upload your creation at our USER GALLERY. Each month, we will highlight one customer. Our Design Team will choose one person from the gallery and they will be on the SPOTLIGHT. Each member of the DT will have a chance to 'scraplift' one of your layouts or ideas from the gallery. User will receive a Gift Certificate worth $10.00 to the store for being the Featured Member. We can't wait to see your creation using this sketch!!!

Thanks for dropping by!
LG

Thursday, March 4, 2010

Stash Faves

Love is in the air with Making Memories Love Struck

I know that February is over but I am so in love. In love with Making Memories Love Struck Collection. Just look at these and you will understand why I feel this way.

I just love all the variety that you could see in this collection. The patterns are so beautiful, the embellishments are all so yummy, and the colors are perfect! So get yours now at YSS Store! There are a lot of more to see in there.

Here are some projects that I did using this gorgeous line:

How Sweet It Is
Key to My Heart
Thanks for viewing!!!
LG

Tuesday, March 2, 2010

Paint Technique

Good day!!!

I would like to share to you my first ever technique class called "Paint Your Flower."

Materials Needed:
1. Prima E-Lines White Paper Flowers
2. Watercolor Paint
3. Paintbrush
4. Crop-a-dile or any 1/8 puncher
5. Inkpad
6. Ink applicator or a sponge
7. additional embellishmets like brads, buttons. gems, etc.

Step 1:
Pick some white paper flowers from your stash preferably the ones you think you might not use very soon.

Step 2:
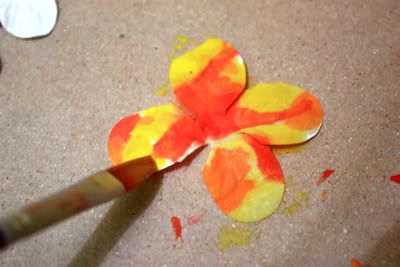
Choose a color combination from your watercolor paint. Choose the colors that will work best with your LO. For my example, I chose yellow, orange and red.

Step 3:
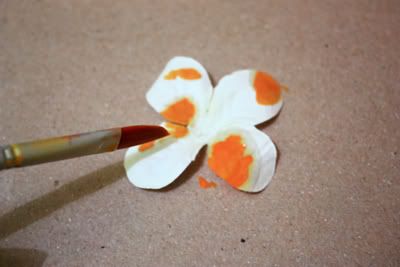
Apply your first colour to your paintbrush and gently dab it randomly to your flower.

Step 4:
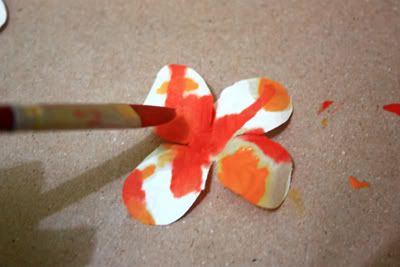
Apply your second colour to your paintbrush and gently dab it randomly to your flower.

Step 5:
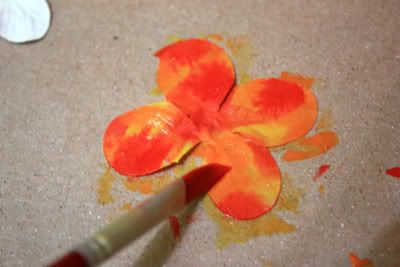
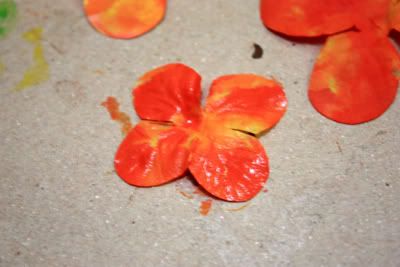
Do the same to your third colour finally covering the entire flower with paint.

Note: You can have 2 different effects by using your watercolor paints.

If you wish to have precise pattern and solid colours and shapes into your flower, use less water.

If you want your colours to blend with one another, use more water. Do not be afraid to experiment on this one.


Step 6:

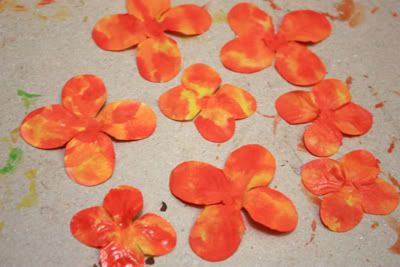
Colour your remaining flowers and set them aside for a couple of minutes to dry up.


Note: Be careful when handling your wet flowers because they might tear.

Step 7:
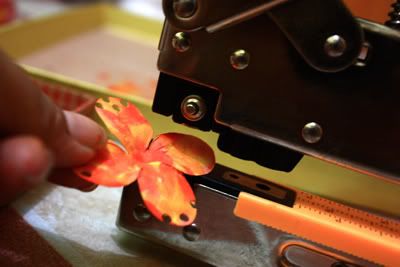
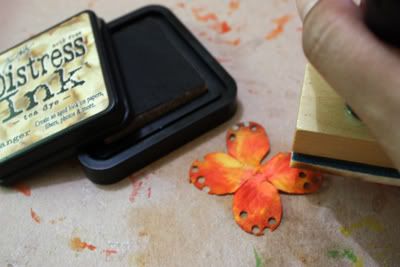
Once it is completely dry, grab a flower and start punching holes on the edge of its petal. Use a crop-a-dile or any puncher set to 1/8 size. Do the same to all the flowers.

Step 8:
Choose an inkpad that you can use to distress the edges of your flower. I chose Ranger Distress Inkpad - Tea Dye by Tim Holtz.
With your ink applicator/sponge, gently apply a small amount of ink to the edges of the flower.
This will add dimension and a distressed look to your flowers.

Step 9:
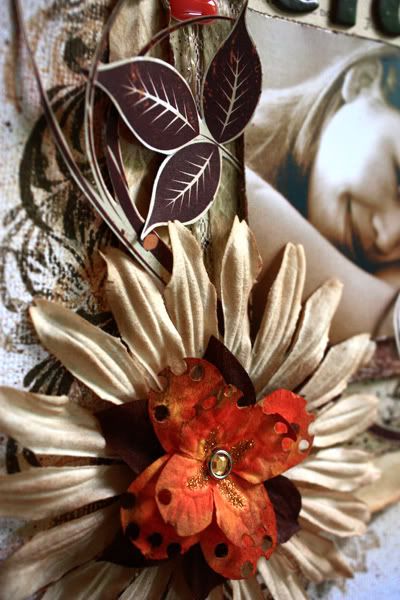
Now feel free to embellish it as you want. You can add brads, buttons, stickes, etc.


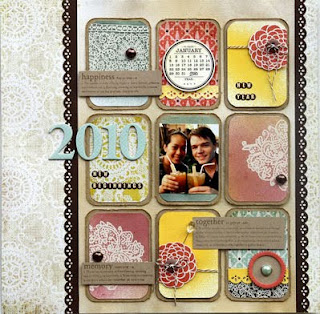
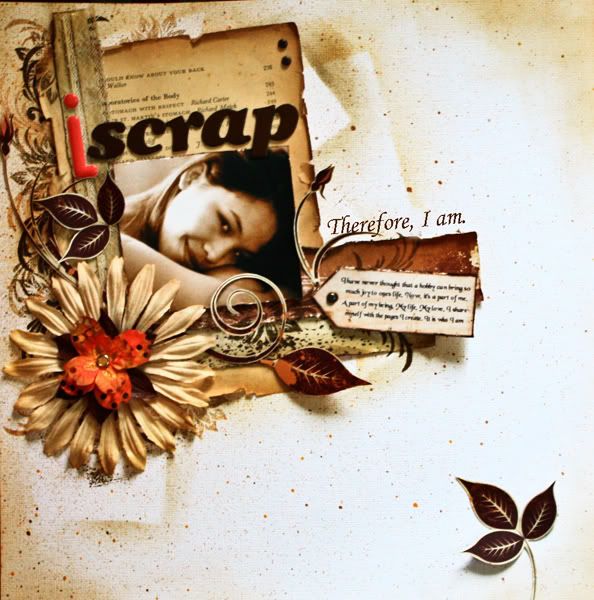
My example LO:
Thanks for dropping by!!!
LG